Email Notifications allow you to receive form submissions directly in your inbox.
Every time someone submits your form, an email is sent with their responses.
In this guide, you’ll learn how to:
- Set the recipient email address
- Edit the email subject
- Customize the email message
- Send notifications to multiple recipients
- Test your email setup
How Email Notifications Work
When a visitor submits your form:
- The submission is saved in WordPress.
- A notification email is generated.
- The email is sent to the address configured in Form Settings.
By default, emails are sent to your WordPress admin email.
You can change this at any time.
Step 1: Open Email Settings
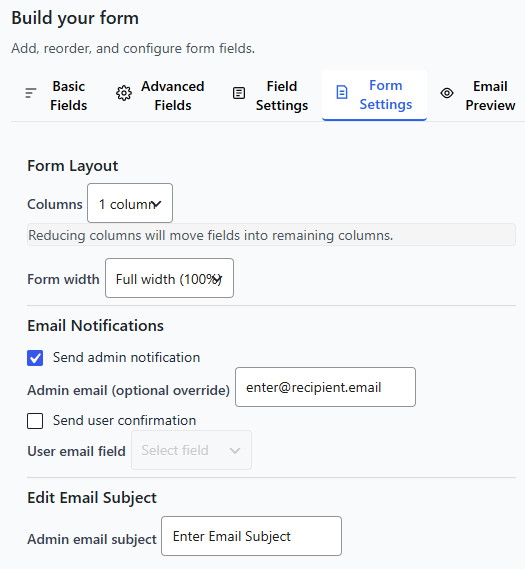
- Open your form in the Form Builder.
- Click the Form Settings tab.
- Scroll to the Email Notifications section.
This is where all email-related options are configured.
Step 2: Set the Recipient Email Address
In admin email enter the email address where you want to receive submissions.
Example:
- support@yourwebsite.com
- sales@yourwebsite.com
You can use any valid email address.
Click Save Form after making changes.
Sending to Multiple Recipients
If you want multiple people to receive submissions:
Enter multiple email addresses separated by commas.
Example:
support@yourwebsite.com, manager@yourwebsite.com
Each address will receive the same submission notification.
Step 3: Edit the Email Subject
The Admin Email Subject controls what appears in your inbox.
Example subjects:
- New Contact Form Submission
- New Inquiry from Website
- New Support Request
You can personalize the subject using field values.
For example:
New message from {Full Name}
This makes it easier to identify emails quickly.
Step 4: Preview the Email
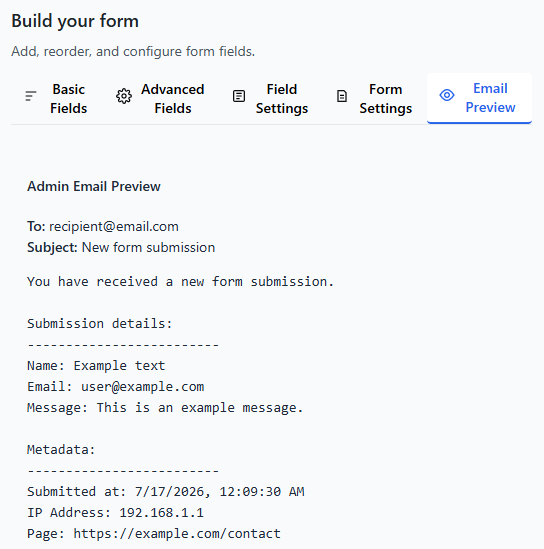
Use the Email Preview tab to:
- Review your subject line
- See how the email body looks
- Confirm formatting
This helps you avoid formatting mistakes before going live.
Step 5: Test Your Email Setup
Always test your email configuration.
- Save your form.
- Visit the page where your form is published.
- Submit a test entry.
- Check your inbox.
If you receive the email, everything is working correctly.
Troubleshooting Email Issues
If emails are not arriving:
1. Check Spam Folder
Sometimes emails are marked as spam.
2. Verify Recipient Email
Make sure the email address is entered correctly.
3. Check Hosting Email Configuration
Some hosting providers require SMTP configuration for reliable email delivery.
If needed, install an SMTP plugin and configure it.
Best Practices for Email Notifications
✔ Use a clear subject line
✔ Include all important fields
✔ Keep formatting clean and readable
✔ Test after making changes
✔ Avoid overly long subject lines
Example: Professional Email Setup
Subject:
New Inquiry from {Full Name}
Message:
You have received a new inquiry:
Name: {Full Name}
Email: {Email Address}
Phone: {Phone}
Message:
{Message}
Submitted on: {Date}
This format keeps everything clean and easy to read.
What to Learn Next
Now that your email notifications are configured, you may want to explore: