
Multi-column layouts allow you to place fields side by side instead of stacking them vertically.
This is useful when you want to:
- Create compact forms
- Place First Name and Last Name on the same row
- Group related fields
- Improve visual balance
In this guide, you’ll learn how to create 2-column and 3-column layouts.
Understanding Column Width
Each field has a Column Width setting inside Field Settings.
By default, fields use Full Width (100%), which means they take the entire row.
To place fields side by side, you should use multiple columns.
Creating a Two-Column Layout
Let’s create a common example: First Name and Last Name side by side.
Step 1: Add Two Text Fields
- Go to Basic Fields.
- Click Text twice.
- Rename them:
- First Name
- Last Name
Step 2: Create two columns for the form
Go to Form Settings. Under Form Layout choose 2 columns.
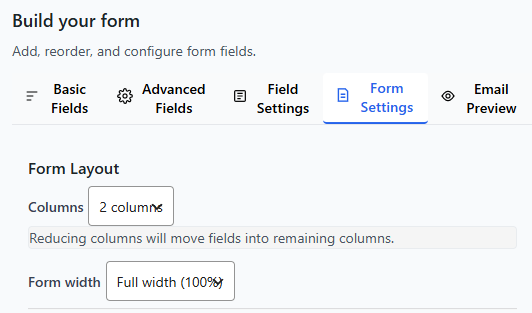
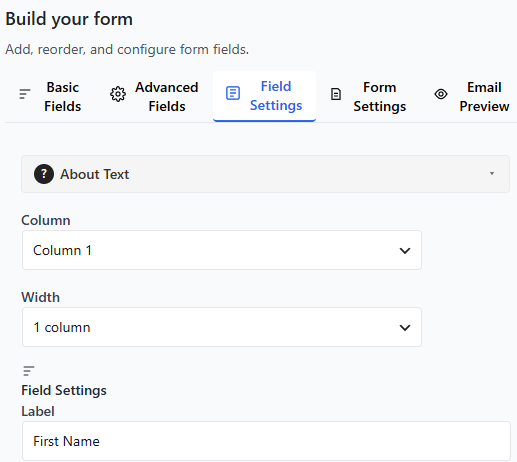
Select the first field and select in which column the field should show up (in column 1 or column 2) and the width of the field (1 column or 2 columns).
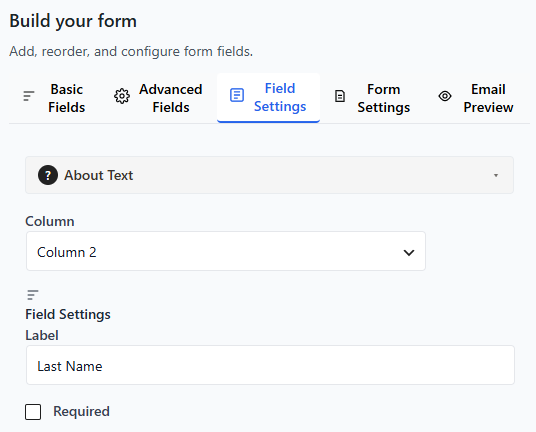
Then, similarly select the column and width option for the second field.
Similarly, if you want to create 3 columns then first select 3 columns in form settings then assigned each field to its respective column and width. Click save and preview the form.
Note: The live preview may not show the fields in the right columns. So, simply save the form and check the page. Secondly, check if the live preview in the mobile mode or desktop or tablet mode. All fields are shown in one column in the mobile mode.
Responsive Behavior
On smaller screens (mobile devices):
- Multi-column layouts automatically stack vertically. All fields show in one column.
- This ensures your form remains easy to use.
You do not need to configure mobile behavior separately.
Best Practices for Multi-Column Layouts
✔ Use columns for related fields
✔ Keep forms visually balanced
✔ Avoid placing too many small fields in one row
✔ Always test the preview before publishing
Good examples:
- First Name / Last Name
- City / State / ZIP
- Start Date / End Date
Avoid:
- Long message fields in narrow columns
- More than three columns in most cases
Common Mistakes
Uneven Spacing
If spacing looks off:
- Double-check column width settings.
- Ensure all fields on the same row use compatible percentages.
Saving Your Layout
After adjusting column widths:
- Review the live preview.
- Click Save Form.
Your multi-column layout is now ready.
What to Learn Next
Now that you understand layout control, you may want to explore: